Connecting to Cisco Unified Communications Manager
If you are using Cisco Unified Communications Manager, you can connect Open Paging Server so that your phones and their IP addresses sync automatically using AXL. And we will cover how to add a SIP trunk so that you can dial into Open Paging Server from Cisco Unified Communications Manager for paging or sending messages, and how to add a External Call Control Profile to send notifications of calls placed to emergency services and/or to any number(s) desired.
If you are not using Cisco Unified Communications Manager, you can skip this step.
Before continuing, make sure you have completed all the prerequisites.
Step 1: Enable Cisco AXL Web Service
If you have not already, you will need to enable the Cisco AXL Web Service.
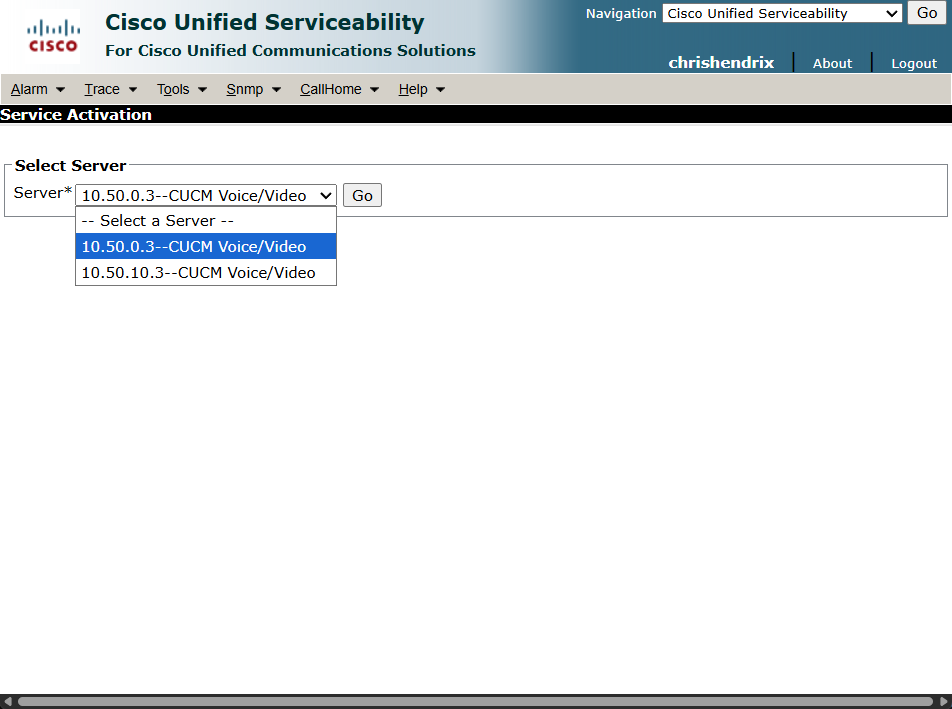
Go to Cisco Unified Serviceability > Tools > Service Activation. Select your publisher. If you want Open Paging Server to also sync from your subscriber(s) if the publisher is down, you can enable the Cisco AXL Web Service for those too.
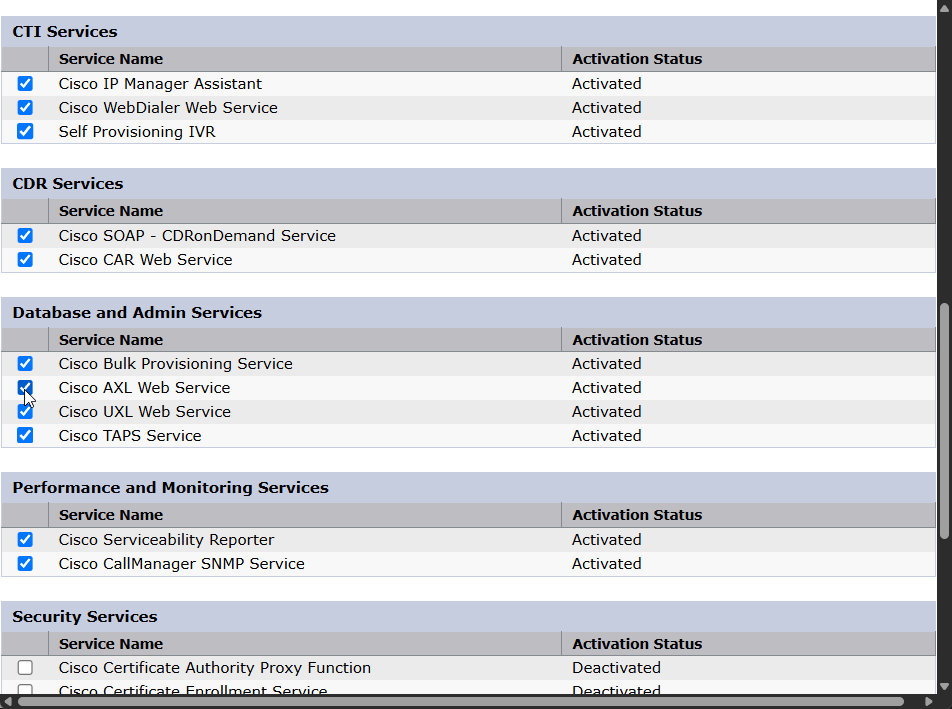
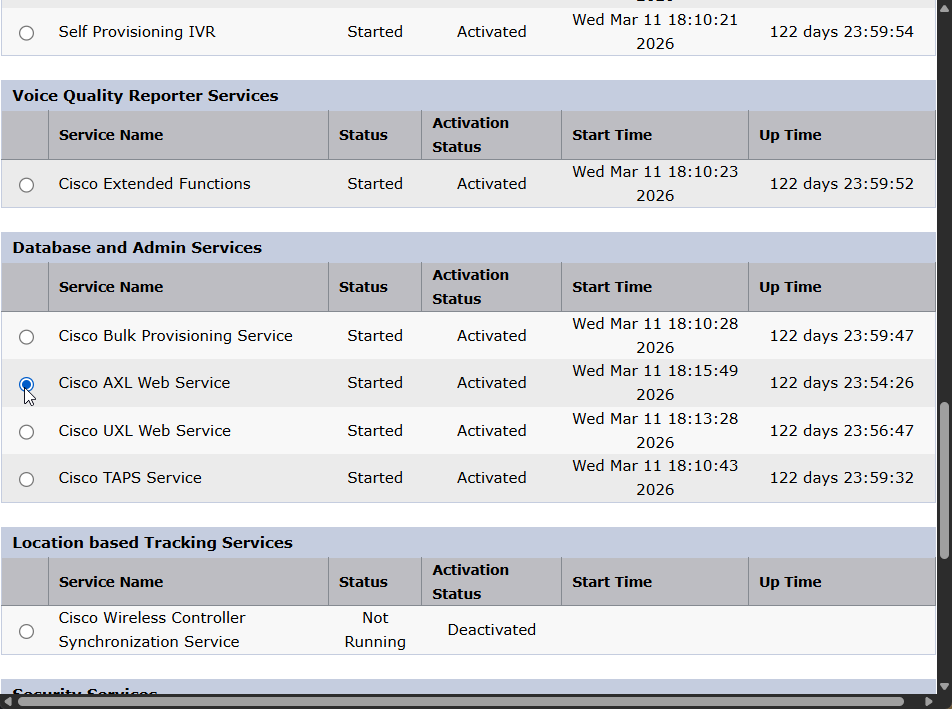
Under Database and Admin Services, check Cisco AXL Web Service, and click Save. Repeat this process for all subscribers.
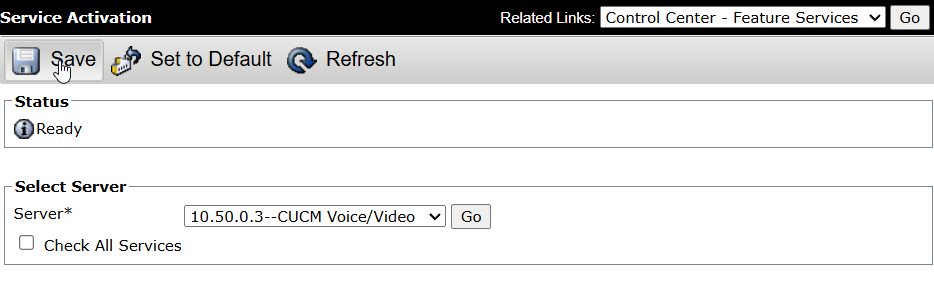
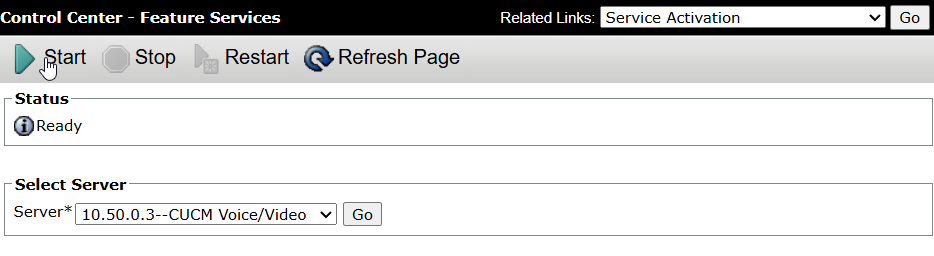
The service should start automatically, however to check, go to Cisco Unified Serviceability > Tools > Control Center - Feature Services. And ensure that the service is running.
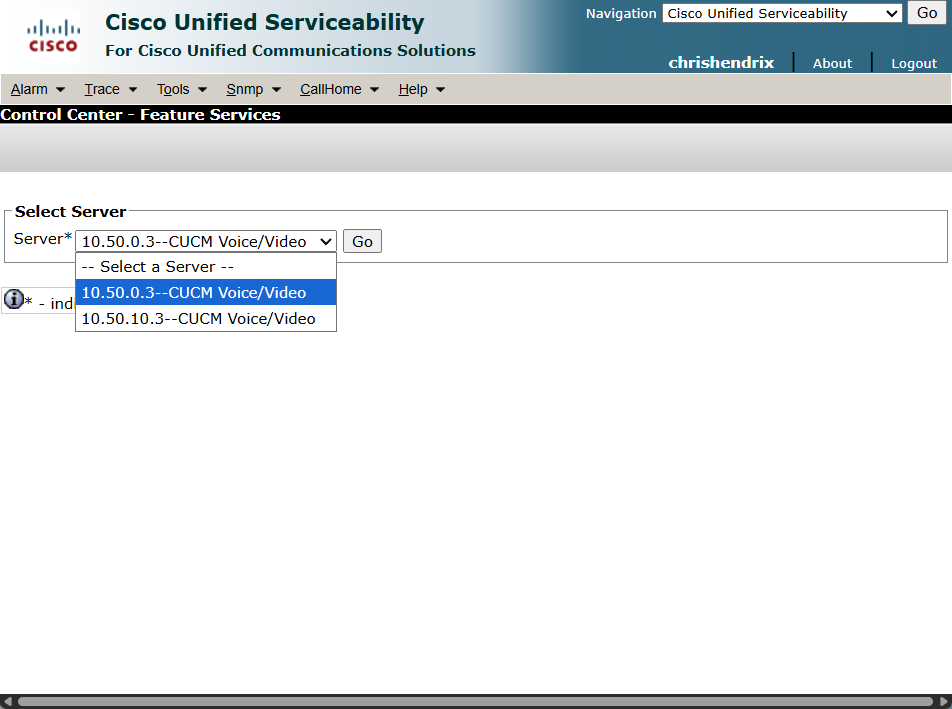
Under Database and Admin Services, select Cisco AXL Web Service and click Start if it's not showing as Activated.
Step 2: Create Application User
Go to Cisco Unified CM Administration > User Management > Application Users and click Add New.
Create a new User ID, and choose a password which will go under both Password, and Digest Credentials. You will need to use these credentials to connect Open Paging Server to CUCM
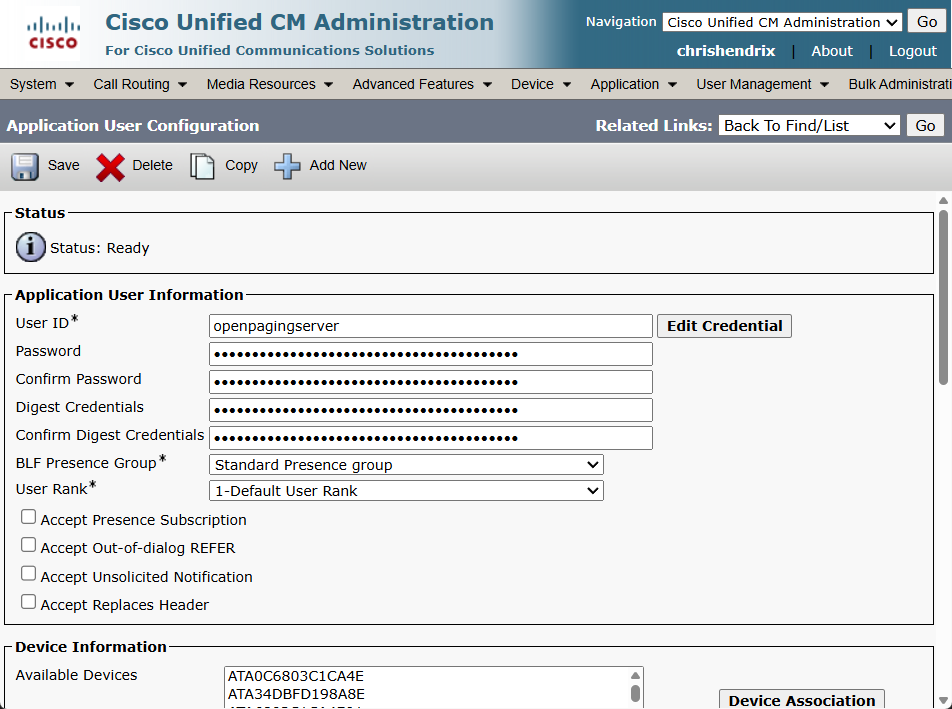
You don't need to assign any devices under Device Information. Open Paging Server does not need to control your devices through CUCM. However, as we mentioned earlier in the documentation, we are researching different ways of sending broadcasts to phones, and this may be one of them in the future. But you can always assign phones in the future if this is ever used.
Under Permissions Information, click Add to Access Control Groups, select Standard AXL API Users, Standard AXL Read Only API Access, Standard CCM Phone Administration and click Add Selected.
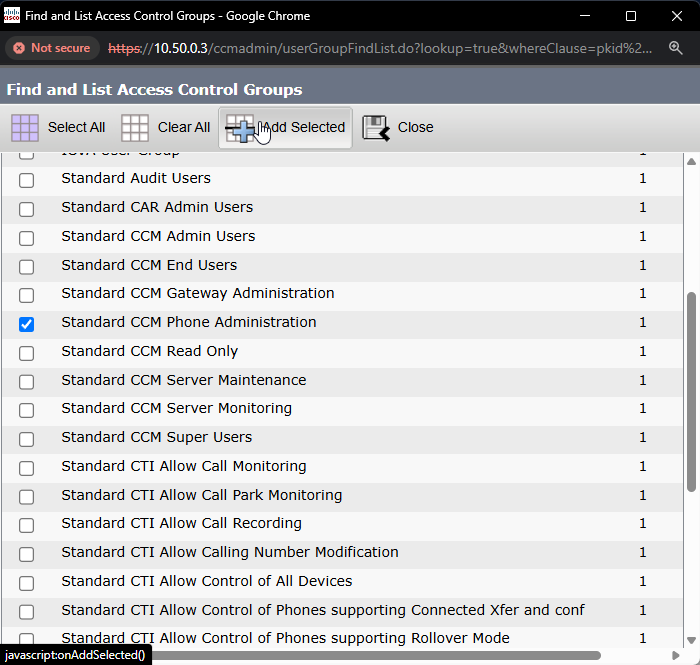
Review the new Application User you created, and click Save.
Step 3: Connect Open Paging Server to CUCM
In Open Paging Server, go to Manage Endpoints, Manage Endpoint Modules, and click Module Settings for Cisco IP Phones.
Enable Sync with Unified Communications Manager (CUCM). In CUCM Server(s), enter the IP address of your publisher followed by any subscribers separated by commas. Enter the User ID in Application User ID and password in Application User Password. You can adjust the CUCM Sync Interval, then click Save Cisco Settings.
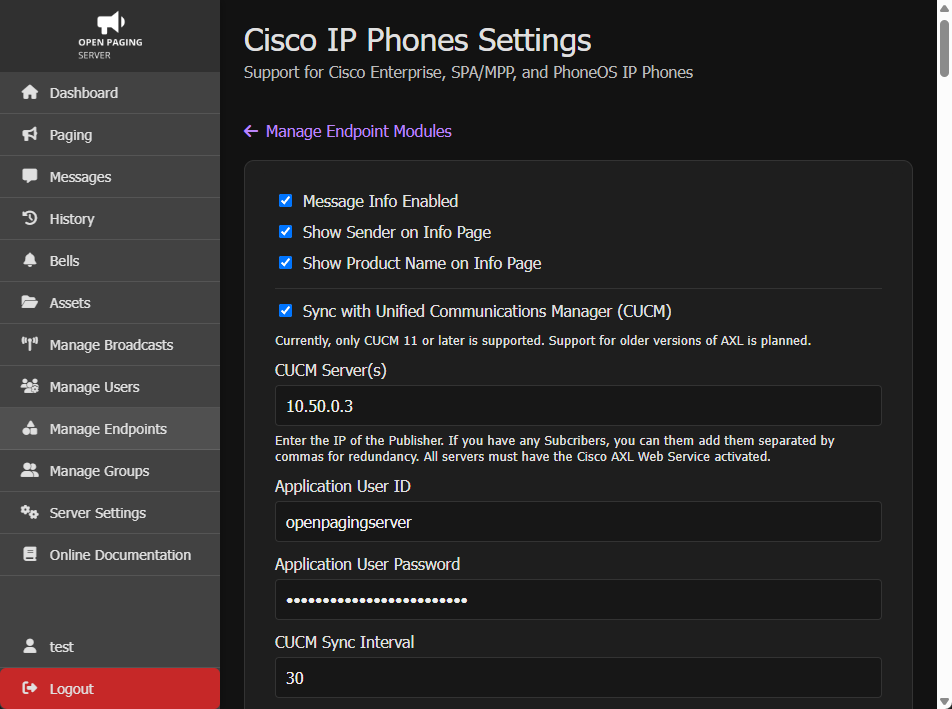
Now click Save Cisco Settings
Your phones should soon auto-populate in Manage Endpoints. If it's been at least twice as long as the sync interval and they still don't show up, check your configuration for any errorss.
Step 4: Adding a SIP trunk
Now that Cisco Unified Communications Manager phones are synced with Open Paging Server, we can add a SIP trunk which will let us access Dial Plan Extensions on Open Paging Server from CUCM. Dial plan extensions let you send pages or messages right from your telephone by dialing a number. We will only cover adding the SIP trunk. You can learn more in Administration > Endpoints > SIP Trunks > Dial Plan Extensions.
When adding your CUCM servers, you may have gotten an option to add the servers as a SIP trunk, if you did so, there is no more configuration needed in Open Paging Server.
To add a SIP trunk in Open Paging Server, go to Manage Endpoints > + > SIP Trunks.
You will want to select a Basic SIP Trunk (IP). If you have a SBC or gateway such as CUBE or Asterisk for SIP trunks, you could use a Inbound-Authenticated SIP Trunk. However, it's recommend to just trunk CUCM directly. Enter a name and IP Address. Do this for all Unified Call Manager nodes which will be in the Device Pool for Open Paging Server.
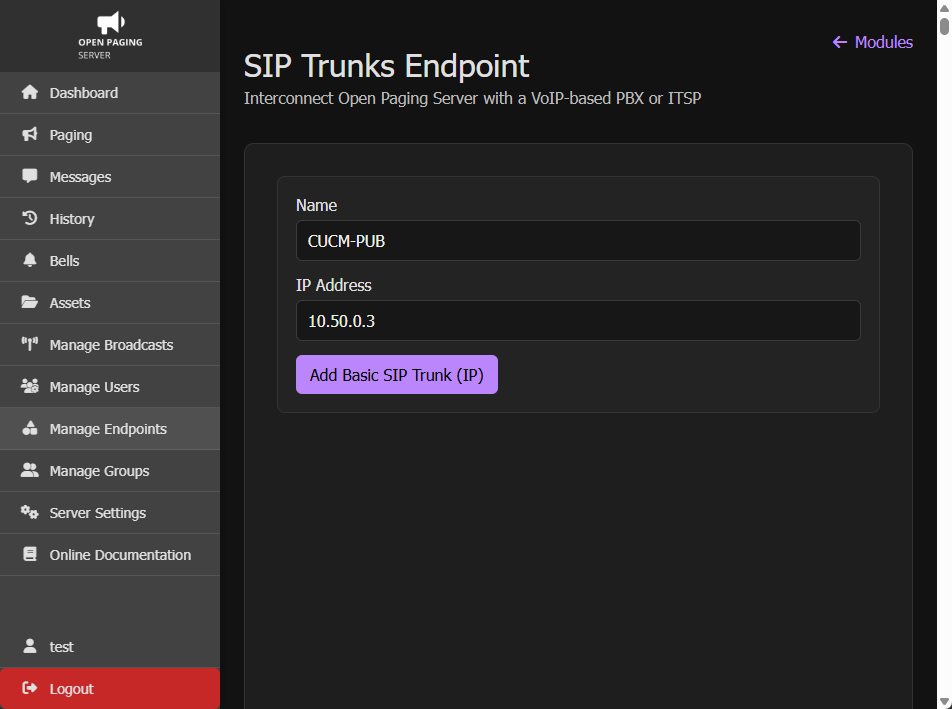
Click Add Basic SIP Trunk (IP)
Go to Cisco Unified CM Administration > Device > Trunk > Add New.
For Trunk Type, select SIP Trunk. Then click Next.
Enter the a Device Name, select your Device Pool, SIP Profile, and use the default Non Secure SIP Trunk Profile. Under SIP Information, enter your Open Paging Server's hostname in Destination Address. And click Save.
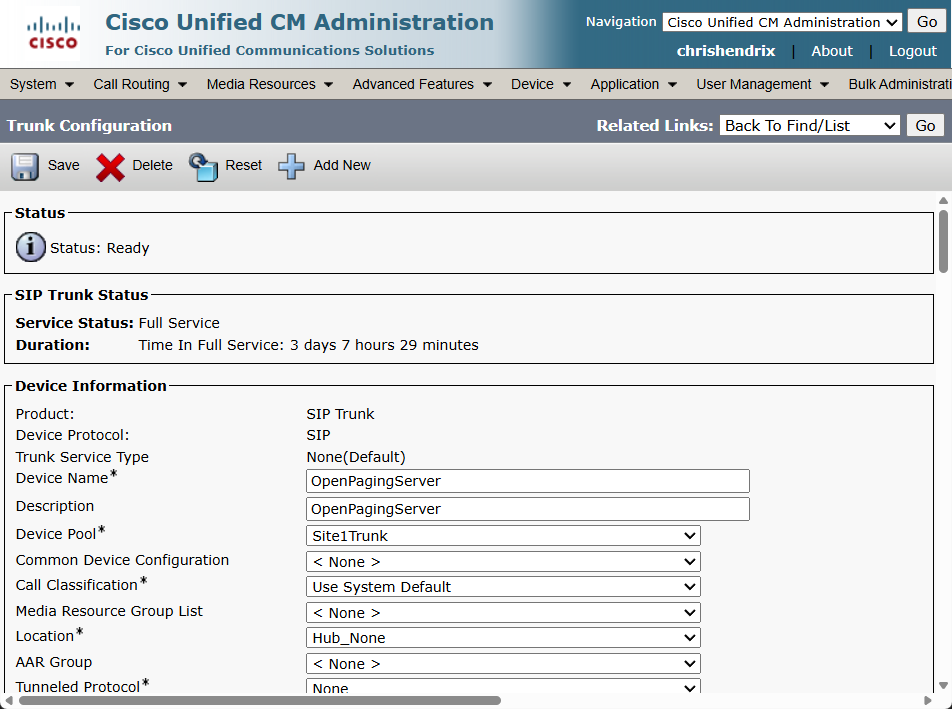
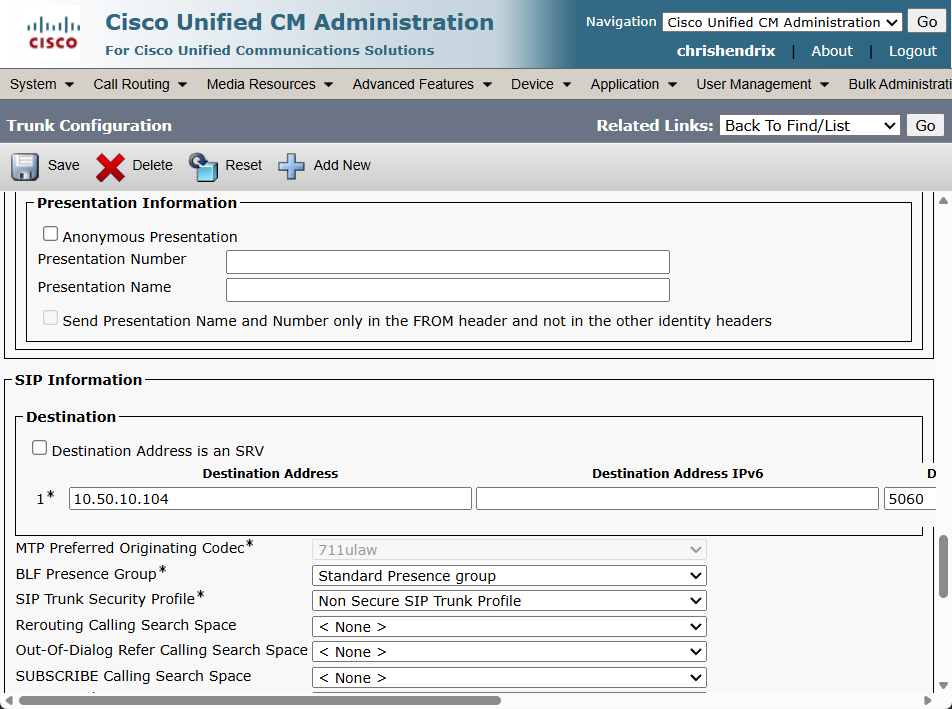
Now go to Call Routing > Route/Hunt > Route Pattern. Click Add New, and add route pattern(s) that match your Dial Plan Extension(s). It could either be wildcards, or one route pattern per extension. Select your Open Paging Server trunk under Gateway/Route List, change Call Classification to OnNet (recommended), and and assign your Route Partition based on your call searching spaces. And click Save.
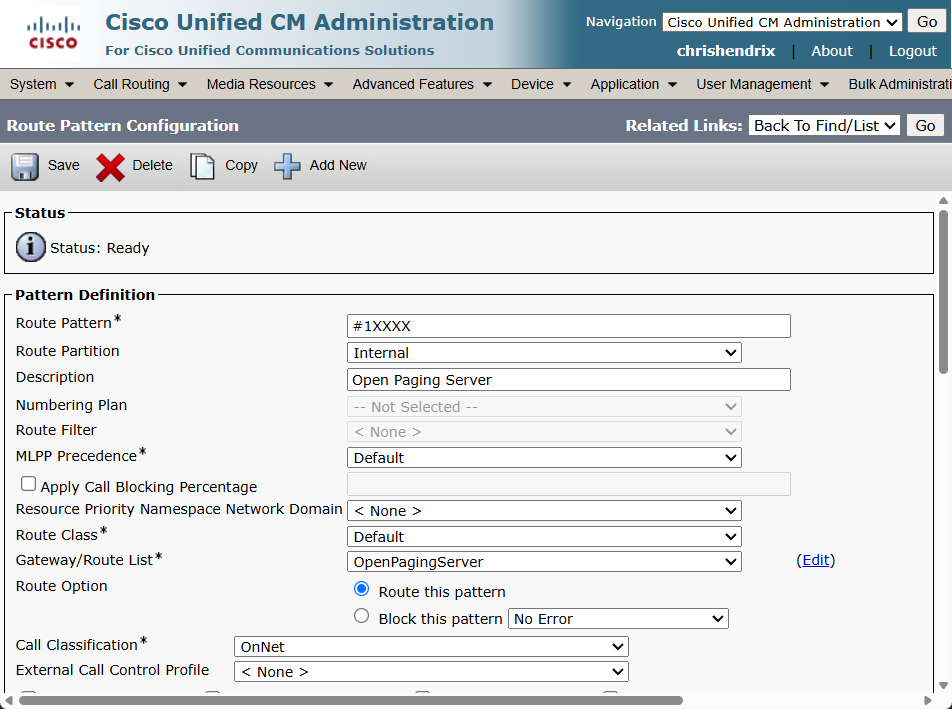
Step 5: Adding a External Call Control Profile
Paging Barge on Yealink IP Phones
Yealink IP Phones have a feature enabled by default called Paging Barge which places a call on hold for pages. However, because unanswered calls cannot be held, they are ended by the page. This is a major issue when configuring E911 alerts, because if the phone is included in a page group that receives 911 alerts, dialing 911 on the phone itself will trigger the alert, ending the call immediately when it's placed. As such, it's best practice to disable Paging Barge under Multicast Listening on the Multicast IP page.
Under federal law (Kari's Law Act of 2017), any multi-line telephone system (MLTS) located in the United States must have central and/or off-site notification of any call placed to 911.
Using External Call Control Profiles, you can use Open Paging Server to comply with E911 notification requirements without compromising on survivability.
You can also use External Call Control Profiles for notification of calls to any telephone number. External Call Control Profiles are typically used to define whether a call is allowed, however it can also be used to notify another server of a placed call. Open Paging Server will always allow any call, regardless of configured notification rules.
When adding your CUCM servers, you may have gotten an option to add External Call Control Profiles. If you did so, there is no more configuration needed in Open Paging Server unless you would like to customize the messages or their recipients. You can find the External Call Control Profile and it's URL under Manage Endpoints > Cisco IP Phones. The profile is by default configured to match all calls and send to all recipients for emergency numbers. 911, 112, 999, and 000. As well as common E911 testing numbers 922, 933, and 5555550911. You'll most likely want to configure the notification to only send to certain endpoints or groups.
To add an external call control profile, in Open Paging Server, go to Manage Endpoints > + > Cisco IP Phones > External Call Control Profile.
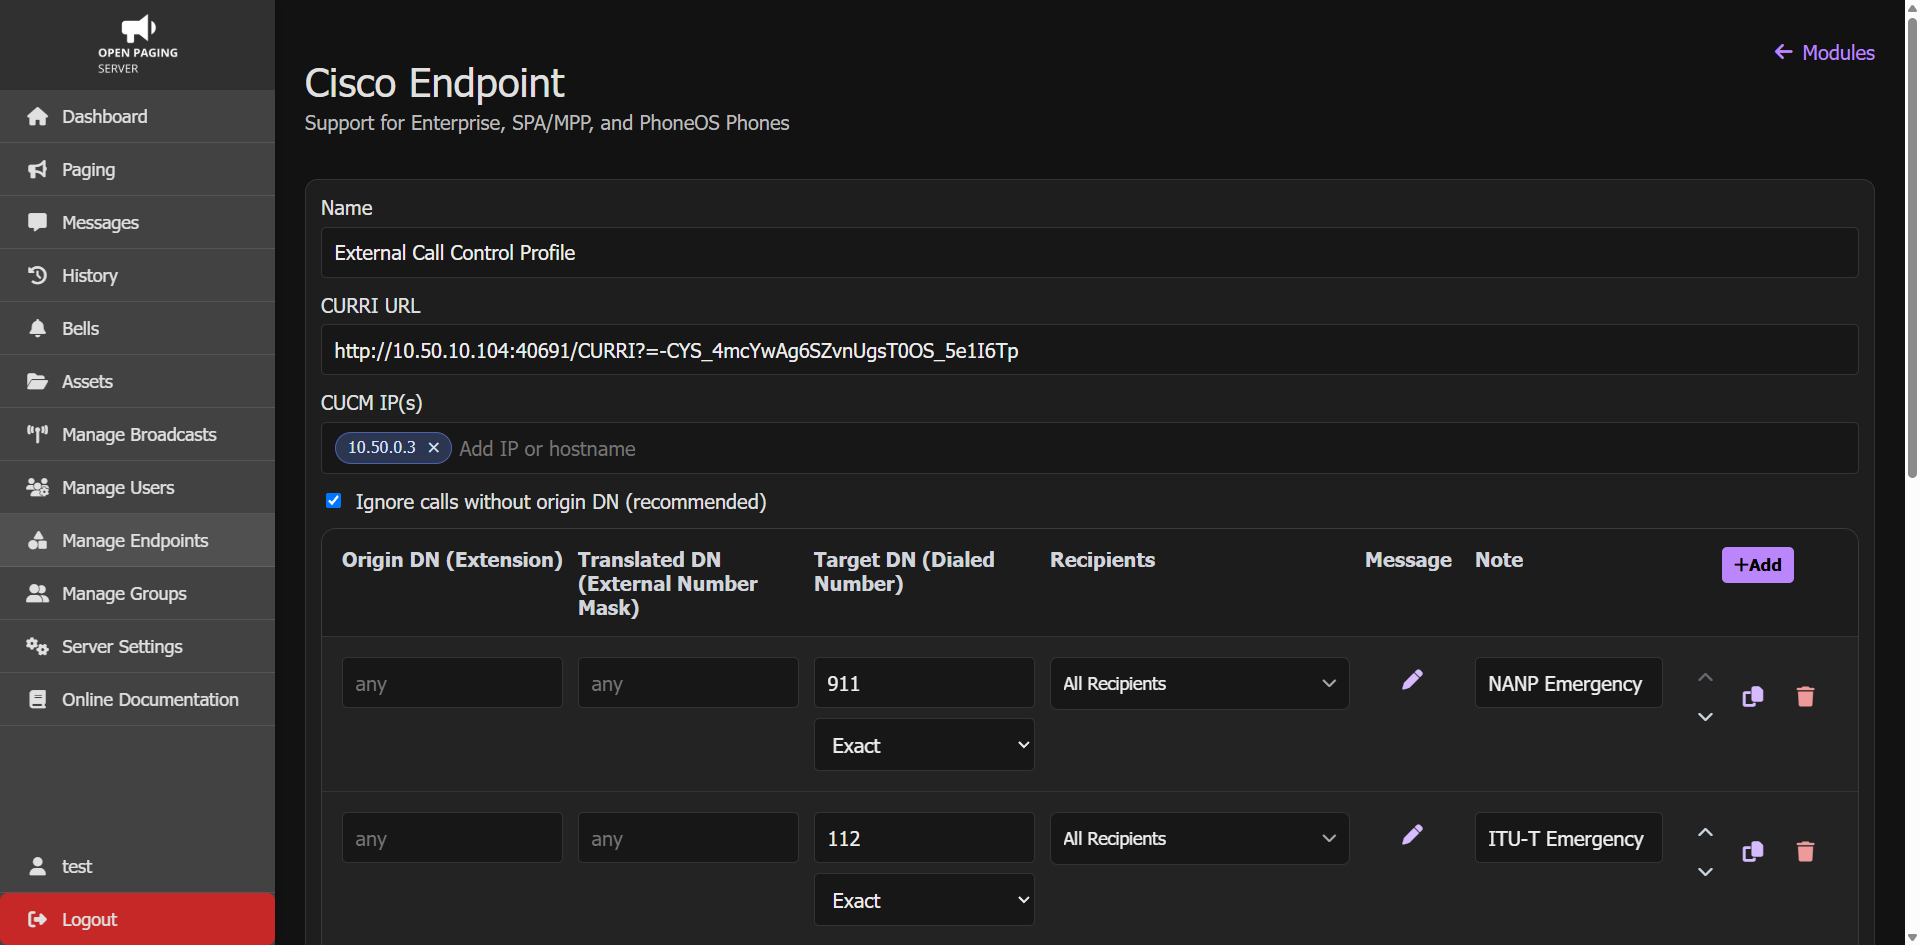
A CURRI URL will be provided based on the current origin of the webpage, you may need to change the hostname depending on your setup. Copy this URL to paste into CUCM. From this page, you can edit the rules. You'll want to change the recipient groups. Click the pencil button in the message row to edit the attached message.
Once your CURRI endpoint is finished, go to Cisco Unified CM Administration > Call Routing > External Call Control Profile and click Add New.
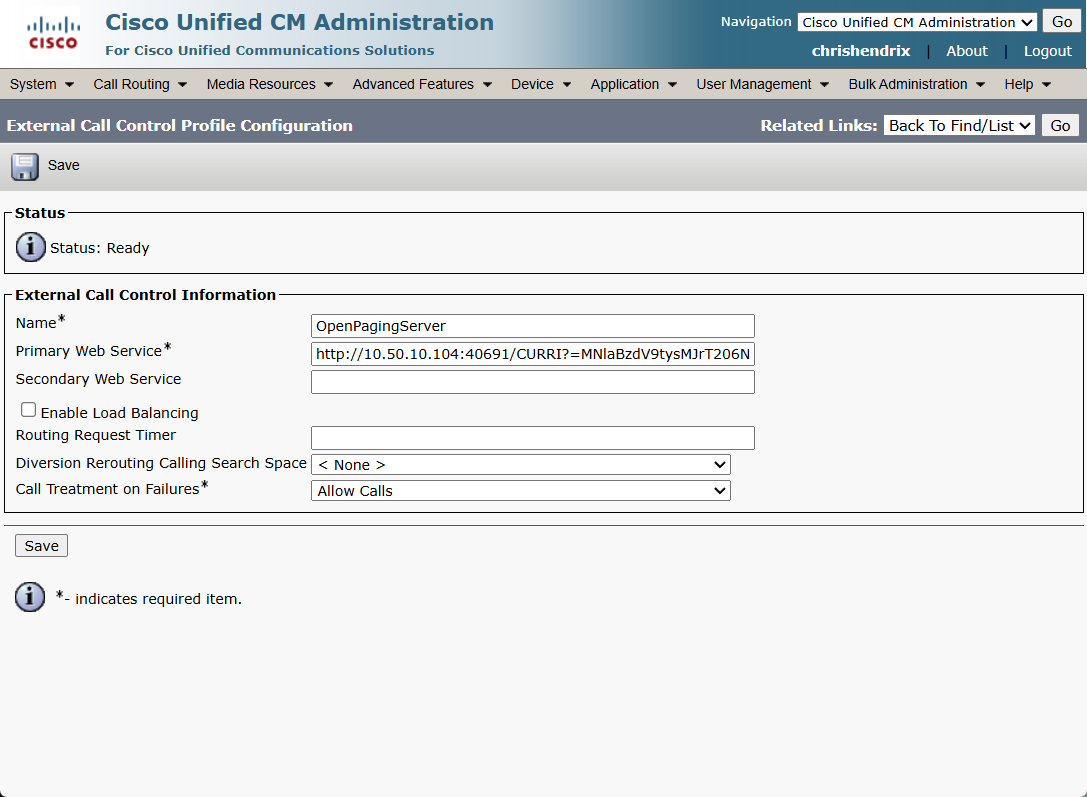
Enter the URL provided by the module under Primary Web Service. Call Treatment on Failures should ALWAYS be set to Allow Calls. Click Save.
Once created, go to Call Routing > Route/Hunt > Route Pattern and go to every applicable route pattern and select the External Call Control Profile.
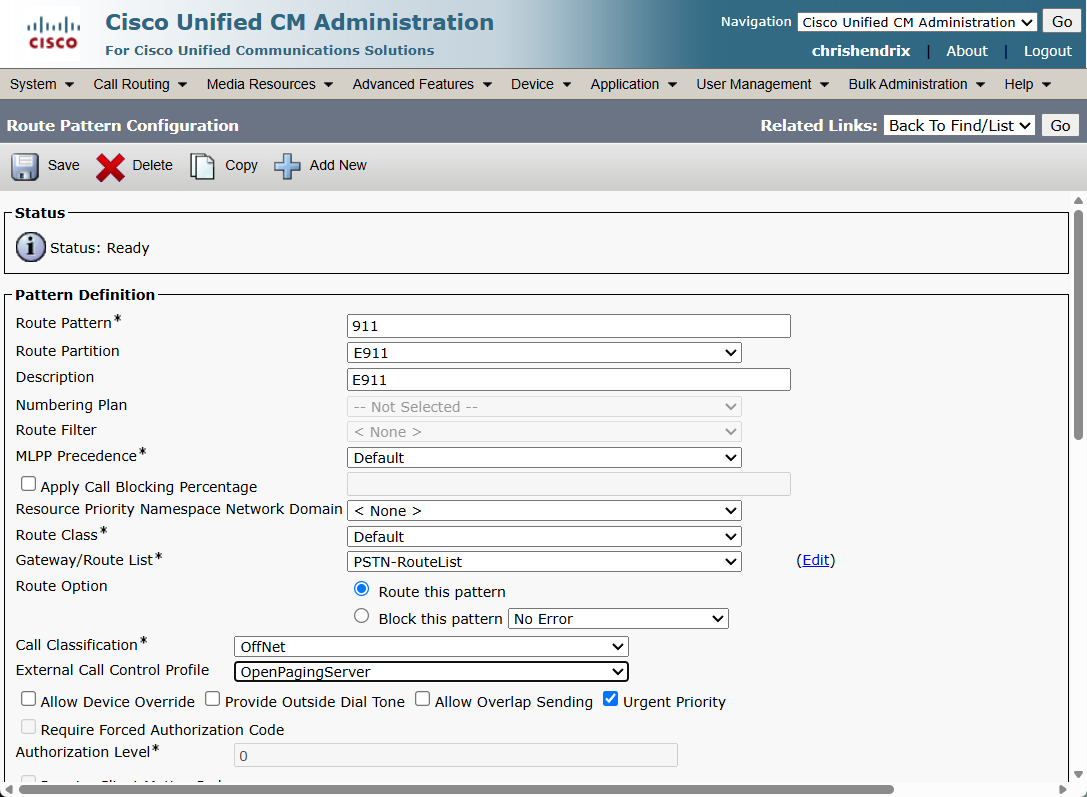
To test, use your telephone providers E911 testing number (such as 922, 933, 5555550911). DO NOT call emergency services unless it's an emergency or apart of a coordinated test with your PSAP.
Closing
Cisco Unified Communications Manager is now fully connected to Open Paging Server. You are now ready to page and send messages to your Cisco IP Phones.
Learn more on how to:
-
Create groups
-
Assign Dial Plan Extensions